ActiveMQ教程
消息发送者
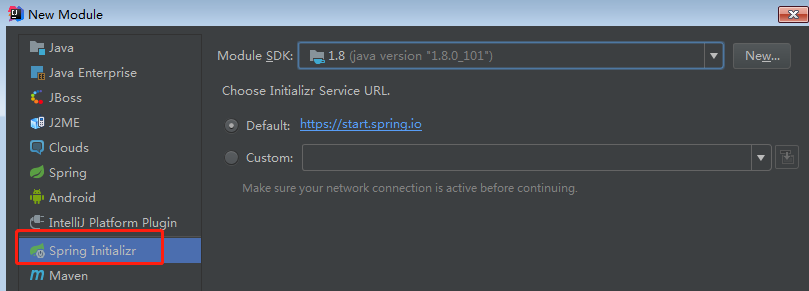
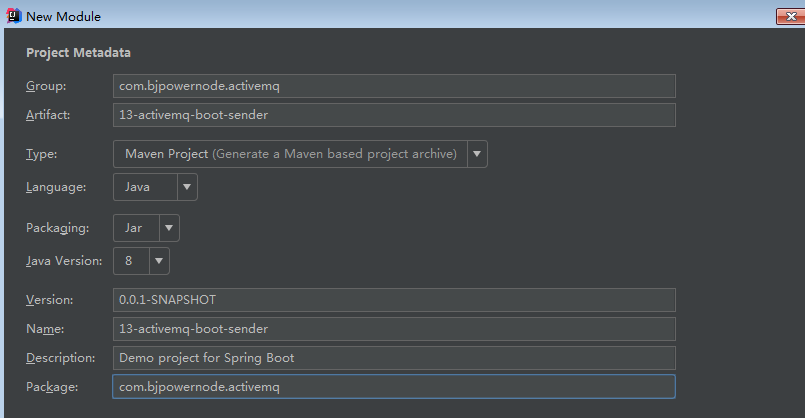
1、创建SpringBoot工程13-activemq-boot-sender作为 消息发送者


2、在pom.xml文件中添加相关依赖
这个依赖在创建Module的时候,如果勾选了集成ActiveMQ会自动生成
<!--SpringBoot集成ActiveMQ的起步依赖-->
<dependency>
   <groupId>org.springframework.boot</groupId>
   <artifactId>spring-boot-starter-activemq</artifactId>
</dependency>
3、 在SpringBoot的核心配置文件application.properties中配置ActiveMQ的连接信息
#配置activemq的连接信息
spring.activemq.broker-url=tcp://192.168.235.128:61616
#目的地
spring.jms.template.default-destination=bootQueue
#默认是缓存了jms的session的,所以主程序发送完消息后,不会退出
# 改为false主程序才可以退出 从SpringBoot2.1.0以后新增的
spring.jms.cache.enabled=false
4、在com.bjpowernode.activemq.service包下创建一个MessageService类,并提供发送消息的方法(可以从12-activemq-spring-sender直接拷贝)
@Service
public class MessageService {
    //这里的JmsTemplate是SpringBoot自动配置的
    @Autowired
    private JmsTemplate jmsTemplate;
    public void sendMessage(){
        jmsTemplate.send(new MessageCreator() {
            public Message createMessage(Session session) throws JMSException {
                return session.createTextMessage("Hello,Spring ActiveMQ");
            }
        });
    }
}
5、在SpringBoot的主程序中编写测试代码,运行测试发送消息
@SpringBootApplication
public class Application {
   public static void main(String[] args) {
      //获取Spring容器
      ConfigurableApplicationContext context = SpringApplication.run(Application.class, args);
      //根据容器获取bean对象
      MessageService messageService = context.getBean("messageService", MessageService.class);
      //调用bean对象的方法, 发送消息
      messageService.sendMessage();
   }
}
6、在ActiveMQ控制台查看效果

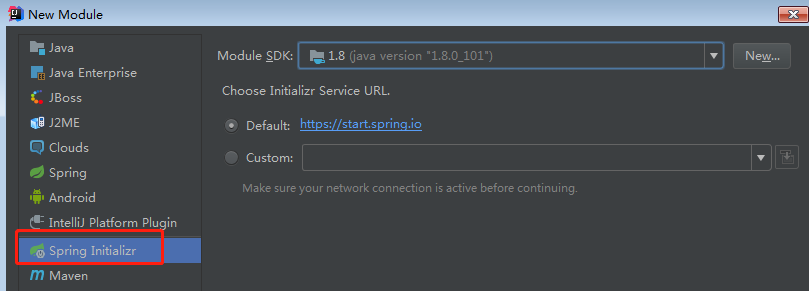
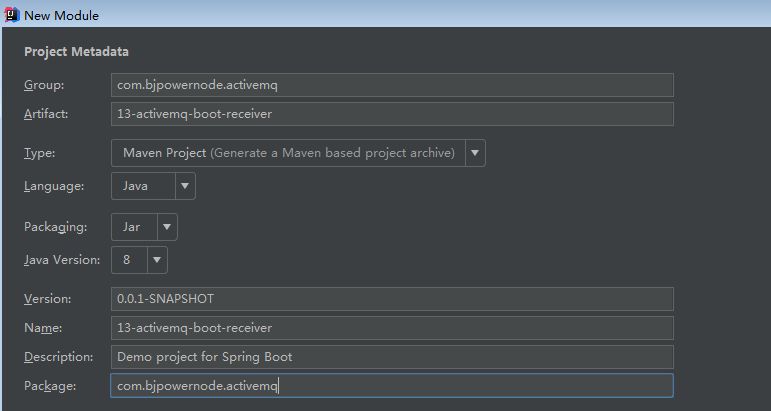
1、 创建SpringBoot工程13-activemq-boot-receiver作为 消息接收者


2、在pom.xml文件中添加相关依赖
这个依赖在创建Module的时候,如果勾选了集成ActiveMQ会自动生成
<!--SpringBoot集成ActiveMQ的起步依赖-->
<dependency>
   <groupId>org.springframework.boot</groupId>
   <artifactId>spring-boot-starter-activemq</artifactId>
</dependency>
3、在SpringBoot的核心配置文件application.properties中配置ActiveMQ的连接信息
#配置activemq的连接信息
spring.activemq.broker-url=tcp://192.168.235.128:61616
#目的地
spring.jms.template.default-destination=bootQueue
#默认是缓存了jms的session的,所以主程序发送完消息后,不会退出
# 改为false主程序才可以退出 从SpringBoot2.1.0以后新增的
spring.jms.cache.enabled=false
4、在com.bjpowernode.activemq.service包下创建一个MessageService类,并提供接收消息的方法(可以从12-activemq-spring-receiver直接拷贝)
@Service
public class MessageService {
    //这里的JmsTemplate是SpringBoot自动配置的
    @Autowired
    private JmsTemplate jmsTemplate;
    public void receiveMessage(){
        Message message = jmsTemplate.receive();
        if(message instanceof TextMessage){
            try {
                String text = ((TextMessage) message).getText();
                System.out.println("SpringBoot接收到的消息为:" + text);
            } catch (JMSException e) {
                e.printStackTrace();
            }
        }
    }
}
5、在SpringBoot的主程序中编写测试代码,运行测试接收消息
SpringBootApplication
public class Application {
   public static void main(String[] args) {
      ConfigurableApplicationContext context = SpringApplication.run(Application.class, args);
      //根据容器获取bean对象
      MessageService messageService = context.getBean("messageService", MessageService.class);
      //调用bean对象的方法, 接收消息
      messageService.receiveMessage();
   }
}

6、在ActiveMQ控制台查看效果
